
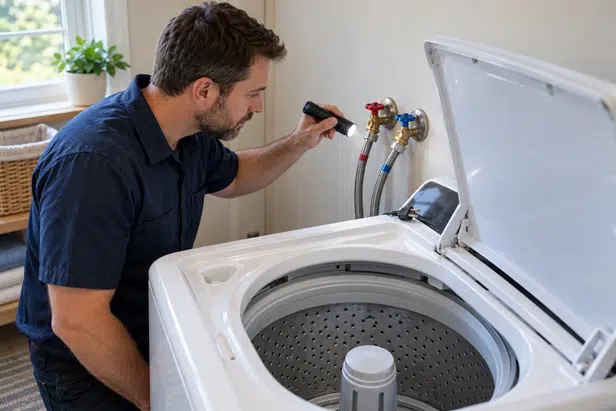
If your Whirlpool washer won’t fill, fills very slowly, or appears to sit at the beginning of a cycle, first establish whether water is absent, entering slowly, or entering and leaving again. Those are different observations, even when they all produce the complaint “no water.”
This is a starting guide for Whirlpool washers, not a universal diagnostic procedure. Record the complete model number and use its owner’s manual and installation instructions. Water levels, sensing sequences, supply requirements, and controls differ between models.
⚠️ SAFETY FIRST: Always unplug the appliance you're working on from the wall outlet, turn off the breaker, or both, to completely disable power before opening the top console or touching electrical wiring.
Before you begin
Keep your hands dry around plugs and controls. Disconnect power before disconnecting hoses or inspecting inlet screens, and close the water supply valves before loosening any connection. Prepare for trapped water in the hoses. If a shutoff valve is seized or leaking, do not force it; arrange plumbing help.
Do not remove cabinet panels, probe energized terminals, or bypass a lid or door lock for these checks. If water is entering uncontrollably, close the supply valves if safely accessible and arrange service. A washer that is overfilling needs a different response from one that is not receiving water.
Listen: distinguish waiting from failed filling
Begin with what the washer does after you select a cycle. Does it acknowledge Start? Does the door or lid close normally? Is there a brief sensing sequence, a water sound, or an error message?
Use the manual’s expected sequence and timing. Do not import a waiting period from another model or repeatedly interrupt the cycle before it has a chance to begin. On the stacked models covered by Whirlpool’s start-up guidance, Control Lock, lid closure, and the way Start is pressed are relevant checks. Apply those controls only if your model has them. Whirlpool: has power but will not start
A sound is a clue, not proof of a good valve. Record whether you actually see or hear incoming water, rather than treating any hum as successful filling.
Observe: low water may be normal
HE washers use less water than an older traditional washers. Cycle choice, load selection, and rinse options can affect how much water is visible. Compare the result with your manual before deciding that clothes must be fully submerged or adding water yourself. Whirlpool: top-load filling and water use
If water is arriving but the level never seems to build, also compare the drain hose installation with the model’s instructions. Incorrect routing or a sealed drain connection can contribute to siphoning. Use your model’s specified dimensions; another washer’s hose height is not a reliable substitute.
Test: check the external water supply
Confirm that the supply arrangement matches the installation instructions. Whirlpool’s hose guidance calls for connected hot and cold supplies on the washers it covers; choosing a cold wash is not, by itself, a reason to leave the hot supply disconnected. Inspect accessible hose runs for sharp bends or pinching. Whirlpool: front-load supply, hoses, and inlet-screen checks
If the problem started immediately after installation, a move, or plumbing work, record that history. It gives you a concrete change to check before assuming an internal component has failed.
Do not remove a flood-protection device simply to experiment. If one is installed, review its instructions and the washer’s requirements; Whirlpool notes that some such devices can restrict the supply.
Check inlet screens only as directed
Where your manual permits it, disconnect power, close the supplies, and carefully disconnect the inlet hoses with a container and towels ready. Inspect the valve’s inlet screens. Whirlpool’s front-load guidance recommends cleaning obstructed screens in place with a brush and mild soap and water; do not pull the screens out of the valve.
Reconnect the hoses according to the installation instructions, restore the supply, and check every disturbed connection for leakage before resuming normal use. If you cannot access or reseal the connections confidently, stop and arrange service. Whirlpool: front-load slow-fill checks
Confirm: did the original condition change?
With everything reassembled, run the manual’s recommended verification cycle. Note whether filling begins, the cycle advances, and the connections remain dry. If the same symptom persists, document your checks instead of repeating them indefinitely.
Supply pressure, valve operation, level sensing, wiring, and control operation require the exact model’s procedure to separate. Do not condemn the inlet valve solely because the washer is not filling.
If the machine displays F8E1, see the AFC F8E1 guide and verify that it applies to your platform. If it displays F3E1, use the AFC F3E1 guide as a separate model-checked diagnostic route. Neither code should be assumed from the symptom alone.