
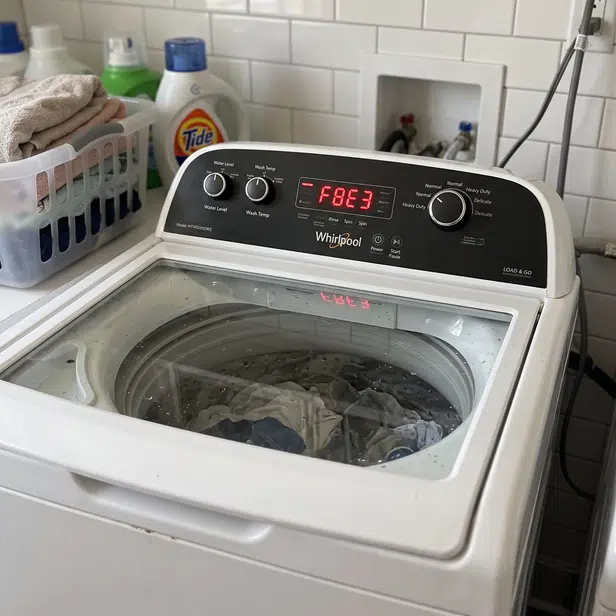
Encountering a Whirlpool washer F8E3 error code (also displayed as F08E03 on digital front-load and top-load displays) indicates an Overflow Condition on Whirlpool, Maytag, Amana, and Kenmore washing machines. This critical diagnostic fault triggers when the main control board (ACU/CCU) senses that water inside the tub has reached or exceeded maximum safe capacity, forcing the washer to halt the active cycle and energize the drain pump continuously to prevent flooding.
In most instances, an F8E3 code stems from a stuck-open water inlet valve solenoid, a pinched or disconnected pressure switch air hose, an over-sudsing condition, or an electronic failure on the main control board.
⚠️ SAFETY FIRST: Always unplug the appliance you're working on from the wall outlet, turn off the breaker, or both, to completely disable power before opening the top console or touching electrical wiring.
What Triggers the Whirlpool Washer F8E3 Error Code?
During any fill, wash, or rinse cycle, the pressure transducer on the main control board continuously measures water volume by tracking air backpressure inside a sealed plastic tube attached to the outer tub air dome. If the water level reaches the calibrated overflow limit, or if the pressure transducer reads continuous rising voltage without stopping, the control board overrides user controls, enters emergency drain mode, and logs the F8E3 fault.
Unlike a standard Whirlpool F8E1 long fill error where water enters too slowly, F8E3 signifies too much water (or the illusion of too much water) inside the tub.
Common failure points include:
- A mechanically failed water inlet valve whose internal diaphragm is stuck open, letting water continuously flow even when the washer is powered off.
- A detached, punctured, or obstructed clear plastic air pressure hose between the tub and the control panel.
- Severe detergent oversudsing trapping air pressure in the dome, similar to what triggers an F0E2 excessive suds error.
- Damaged harness wiring or shorted terminals at main control board header J14 or water valve header J15.
- A failed pressure transducer logic circuit on the main Appliance Control Unit (ACU).
Step-by-Step Diagnostic & Repair Guide
⚠️ Safety Warning: Unplug the washer from the electrical outlet before removing access panels or performing resistance checks. When working around water inlet valves, turn off both hot and cold home water supply spigots.
Step 1: The “Unplugged Flow” Mechanical Valve Test
Determine if the failure is mechanical (stuck valve) or electrical (bad control board/sensor) using this simple physical test:
- Observe if water continues entering the wash tub while the machine is running and displaying F8E3.
- Unplug the washer directly from the wall outlet while water is actively flowing into the tub.
- If water CONTINUES filling with power disconnected: The water inlet valve is mechanically stuck open due to sediment or a torn internal rubber diaphragm. Replace the water inlet valve assembly immediately.
- If water STOPS filling the moment power is pulled: The valve solenoids are receiving continuous 120 VAC voltage from a stuck relay on the main control board or a confused pressure sensor circuit. Proceed to Step 2.
Step 2: Inspect the Pressure Transducer Air Hose
- Remove the console or rear service panel to locate the clear plastic pressure hose connected to the control board transducer nipple.
- Check for loose clamps, cracks, water accumulation inside the line, or soap scum blockages at the lower tub air dome.
- Disconnect the hose at the pressure switch end and blow gently through the tube toward the tub. Air should pass freely through to the tub. If you encounter resistance, clear the air dome nipple of sediment using a flexible brush.
- If the air hose is clear and sealed tight, inspect the pressure transducer circuit using our Whirlpool F3E1 pressure switch diagnostic guide.
Step 3: Test Electrical Components with a Multimeter
Disconnect power, remove the rear access panel, and unplug the wire harness connectors from the water inlet valve solenoids and pressure sensor headers. Set your digital multimeter to Resistance (Ohms / Ω) or AC/DC Volts:
| Component / Test Point | Expected Electrical Spec | Diagnostic Verdict |
| Water Valve Solenoids (Hot & Cold Coils) | 800 Ω to 1200 Ω (0.8 kΩ to 1.2 kΩ) | PASS: Solenoid coil resistance is within normal limits. |
| Water Valve Solenoids (Hot & Cold Coils) | 0 Ω (Short) or Open / OL | FAIL: Solenoid coil is burned out. Replace water inlet valve. |
| Valve Harness Voltage during Fill (J15 to Valve) | 120 VAC | PASS: Control board is correctly sending line voltage to fill. |
| Valve Harness Voltage when Standby/Off | 0 VAC | FAIL: (>10 VAC constant indicates a shorted board relay). Replace ACU. |
| Pressure Transducer Reference (Pin 1 to 3) | +5 VDC Constant | PASS: Control board supply circuit is operating normally. |
Calibration & Diagnostic Modes by Machine Type
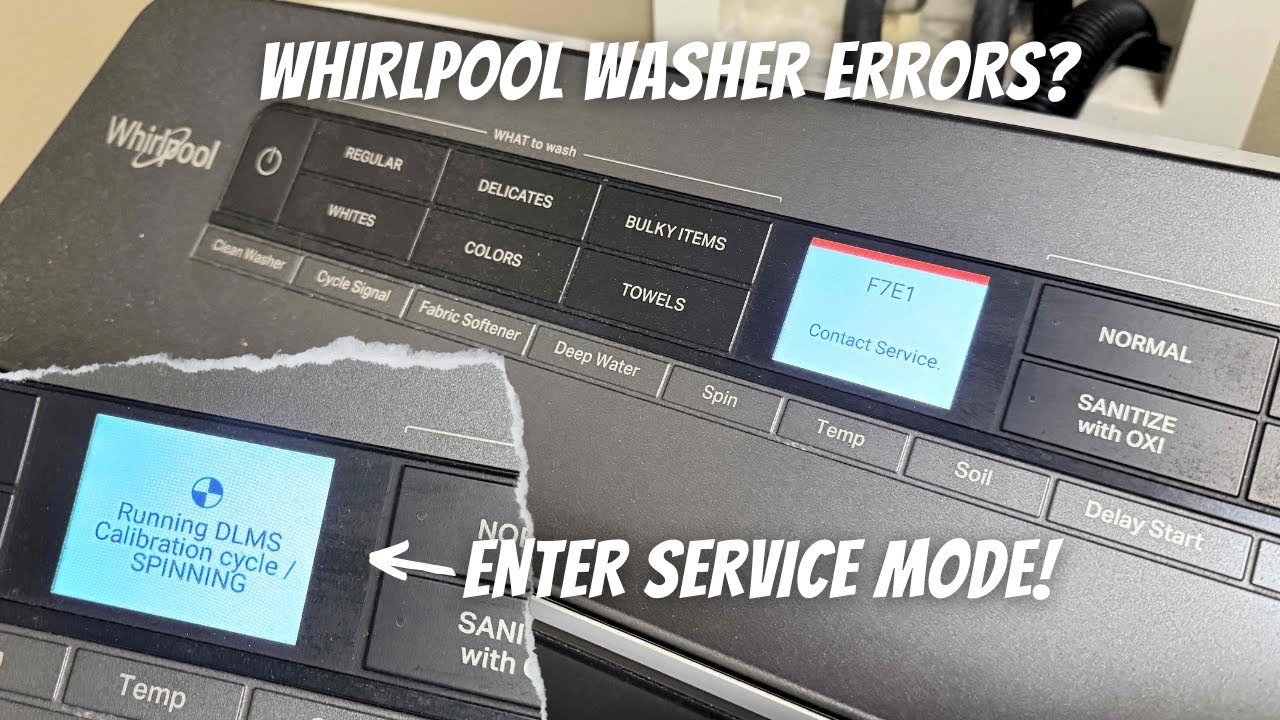
Once you have replaced a failed inlet valve or cleared a clogged air hose, you must run an automated calibration cycle to reset board memory and re-establish the baseline pressure sensor reference.
Category 1: Rotary Knob Top Loaders (VMW Platform)
Examples: Whirlpool WTW5000DW, Maytag MVWC565FW, Amana NTW4516FW
- Clear Memory: Turn the cycle selector dial counterclockwise 1 full rotation to clear dial positioning.
- Enter Service Mode: Turn the dial Right 3 clicks, Left 1 click, and Right 1 click within 6 seconds. All green status lights will flash when successful.
- Run Calibration: Rotate the dial until only the Rinse status LED is illuminated. Ensure the washer tub is completely empty, then press START. Allow the machine to run its full 2-to-4 minute self-calibration.
Category 2: Push-Button / Digital Touch Top Loaders (Cabrio, Bravos, Smart Series)
Examples: Whirlpool WTW8500DC, Maytag MVWB835DW, MVW6230HC
- With the machine in Standby mode (plugged in with screen off), choose any 3 non-power control buttons.
- Press the 3 buttons in sequence: 1 – 2 – 3, 1 – 2 – 3, 1 – 2 – 3 within 8 seconds.
- All console lights will illuminate to verify active Service Mode.
- Press Power / Cancel once to clear historical error codes, then press Start while code 88 or C0 displays to start the automated test routine.
Category 3: Front-Load Washers (Duet, Epic, Modern Front Loaders)
Examples: Whirlpool WFW92HEFC, Maytag MHW5630HW
- Ensure the machine is in Standby mode (powered off, plugged in).
- Select any control button (except Power) and perform: Hold 3 seconds -> Release 3 seconds -> Repeat 3 times.
- Saved diagnostic codes will display on screen. Press Power / Cancel to erase historical error logs and exit.
Video Walkthrough: Recalibrating Your Whirlpool Washer
Watch this complete step-by-step video to visually follow the knob turn sequence and verify successful calibration mode entry:
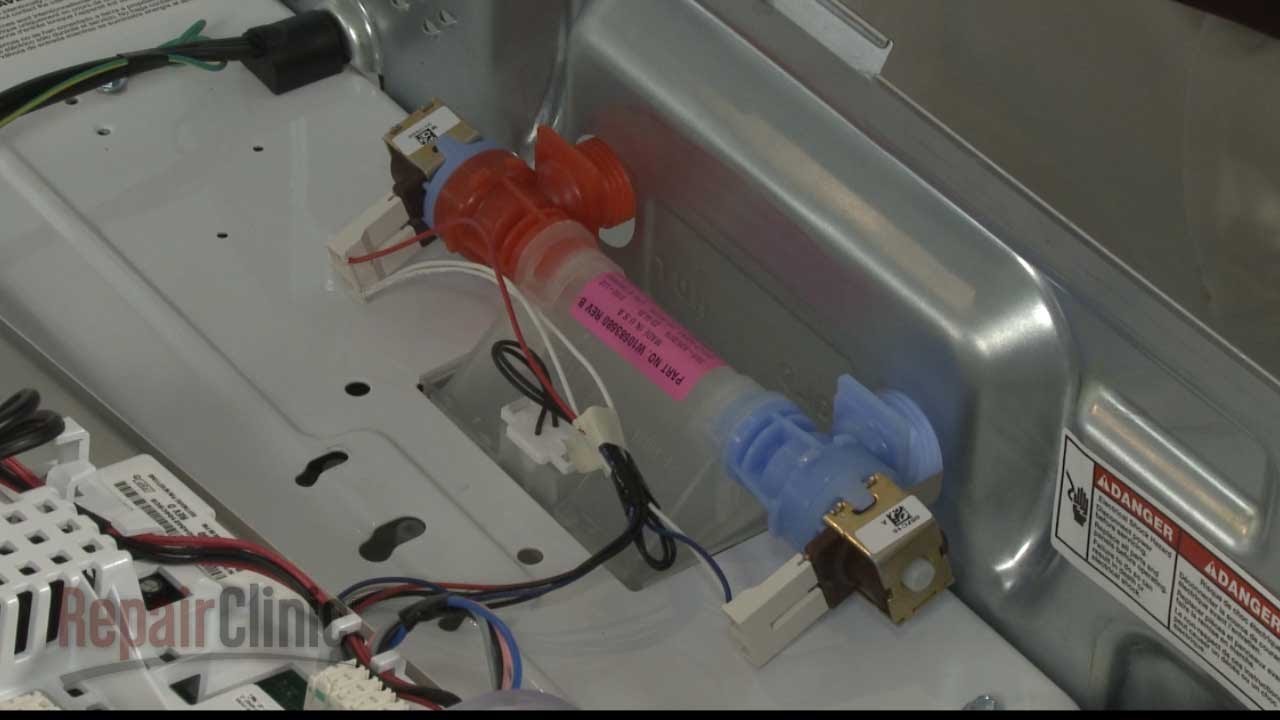
Video Guide: Testing and Replacing a Water Inlet Valve
If your unplugged flow test or multimeter check confirms a defective water inlet valve, replacing the assembly takes under 20 minutes. Watch this complete replacement walkthrough:
How to Clear the F8E3 Error Code
- Perform Hard Reset: Disconnect the washer power cord from the wall outlet for 5 full minutes to drain circuit board capacitors and clear stored fault memory.
- Drain Excess Water: If water remains in the tub, reconnect power, select Drain & Spin, and let the F9E1 drain pump system clear all liquid.
- Execute Calibration Sequence: Run the platform-specific Calibration Routine detailed above with an empty tub to calibrate the pressure switch baseline.
Related Diagnostic Guides
- Whirlpool Washer F8E1 Error Code (Long Fill / Water Inlet Valve)
- Whirlpool Washer F3E1 Error Code (Pressure Sensor / Switch Fault)
- Whirlpool Washer F9E1 Error Code (Long Drain Fault)
- Whirlpool Washer F0E2 Error Code (Excessive Suds Condition)
Resolving Your Whirlpool Washer F8E3 Error Code
Troubleshooting a Whirlpool or Maytag washer F8E3 error code comes down to isolating mechanical valve failures from electrical pressure sensor faults. By executing the unplugged flow test, verifying 800 Ω to 1200 Ω solenoid resistance, checking for air transducer hose punctures, and clearing stored board memory with a calibration cycle, you can resolve overfill errors cleanly and protect your laundry room from costly water damage. Thanks for stoping by!