
What Does the F7E1 Error Code Mean?
On Whirlpool, Maytag, Amana, and Kenmore top-load washers, the F7E1 error code indicates a Basket Speed Sensor Fault.
Your washer’s main control board expects the basket to reach a specific RPM during the cycle. If the main control loses communication with the optical speed sensor on the shift actuator—or if the drive system physically cannot reach target speed—the washer aborts the cycle and triggers the F7E1 error code.
Common Symptoms of the F7E1 Code
- The washer stops mid-cycle during the drain or spin phase.
- Clothes come out soaking wet because the tub never reached full spin speed.
- You may hear a faint clicking sound beneath the washer before the machine pauses.
- The “Sensing” or “Spin” indicator light flashes repeatedly.
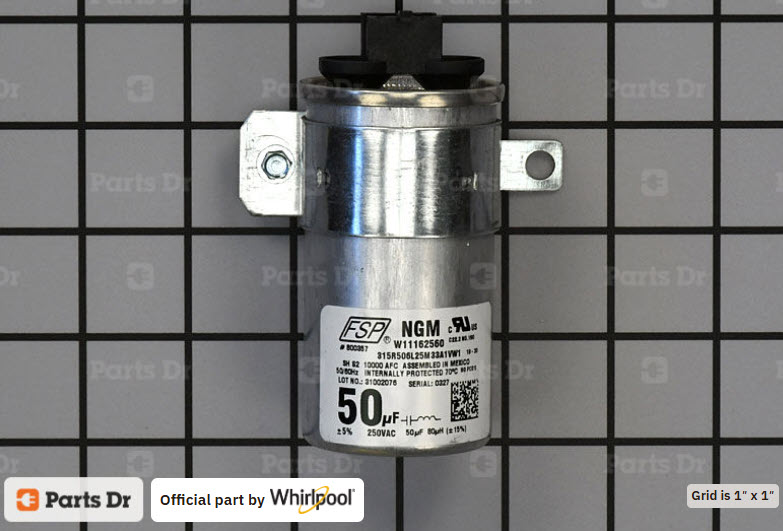
Faulty Motor Run Capacitor: A degraded capacitor prevents the drive motor from reaching full power during spin cycles. Many times, you’ll hear a growling sound when the capacitor is failing under load. If your meter can measure capacitance, a good capacitor will measure very close to 50 microfarads. 45 or less makes this part questionable at best. Replacing it now makes sense.
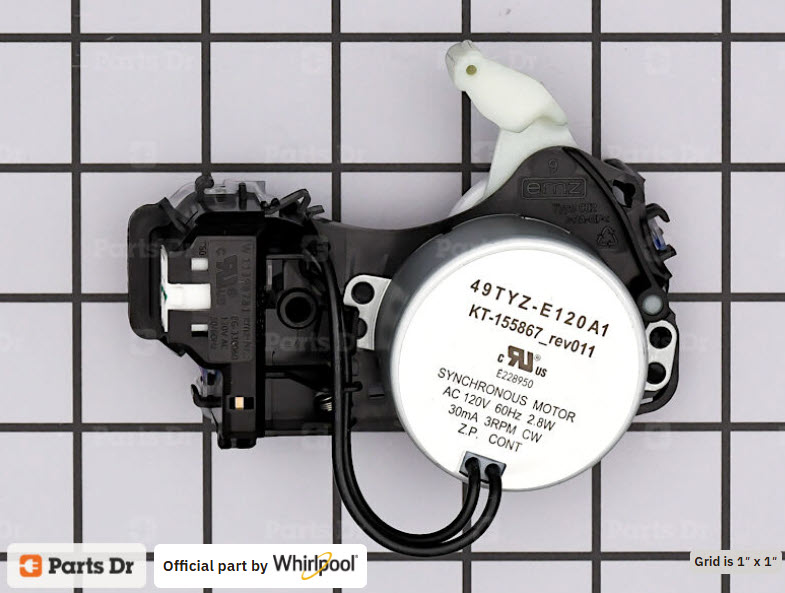
- Faulty Shift Actuator (Most Common – 85% of cases): The shift actuator sits on the gearcase under the machine and houses the optical speed sensor. When that sensor fails, the main control receives zero speed feedback.
- Worn Drive Belt or Splutch Assembly: A loose or greasy drive belt slips under load, preventing full spin speed.
Step-by-Step Diagnostic Routine
Before ordering parts, follow this quick diagnostic routine to confirm the exact failure point.
⚠️ SAFETY FIRST: Always unplug the washer from the wall outlet and turn off the water supply valves before servicing any electrical component.
Step 1: Physical Inspection Below the Washer
- Carefully tilt the washer back and secure it safely against a wall.
- Remove the plastic belt guard on the bottom.
- Inspect the rubber drive belt. If it shows cracks, severe wear, or oily residue, replace it. An oily belt likely means the tub bearing above is wearing out and is leaking its lubrication.
- Rotate the splutch pulley by hand. The cam should shift smoothly between agitate and spin positions without binding, excessive resistance, or grinding. Depending on the position of the cam and shift actuator, the basket and agitator may either move independently (agitate mode) or lock together (spin mode).
Testing the Shift Actuator with a Multimeter
- Unplug the washer from the electrical outlet.
- Locate the shift actuator mounted beside the splutch assembly underneath the washer.
- Disconnect the actuator wiring harness.
- Set a digital multimeter to the resistance (Ω) scale.
- Measure the resistance across the shift-motor winding terminals.
- Compare your reading to the specifications on the tech sheet that is with your machine.
Expected Results
- Normal: Approximately 2,000 Ω to 3,500 Ω (typically around 2.8 kΩ).
- Open Circuit (OL): Shift actuator winding is open and the actuator should be replaced.
- Near 0 Ω: Winding is shorted and the actuator should be replaced.
How to Fix the F7E1 Code
If your multimeter reading failed or the optical sensor stopped sending pulses, replacing the shift actuator resolves the issue in the vast majority of cases.
Required OEM Replacement Part:
- Primary OEM Part: Shift Actuator W10597177 (typical representation)
Step-by-Step Replacement Instructions
- Unplug the washer.
- Tilt the machine back to access the bottom drive assembly.
- Remove the two mounting screws holding the shift actuator to the gearcase using a Phillips #2 screwdriver.
- Unclip the shift arm from the splutch ring and disconnect the wiring harness.
- Snap the new shift actuator arm into the splutch ring notch.
- Reinstall the mounting screws, reconnect the 6-pin harness, and replace the protective belt guard.
- Plug the washer in and run a calibration cycle. See Below.
Calibration & Diagnostic Modes by Machine Type
After replacing the shift actuator, you must clear the error code and recalibrate the machine. Because Whirlpool and Maytag build washers across different design platforms, locate your control panel style below to run the correct sequence:
Category 1: Rotary Knob Top Loaders (VMW Platform)
Examples: Whirlpool WTW5000DW, Maytag MVWC565FW, Amana NTW4516FW
- Clear Memory: Turn the selector dial counterclockwise 1 full turn.
- Enter Diagnostics: Turn the dial Right 3 clicks, Left 1 click, then Right 1 click (within 6 seconds).
- Run Calibration: With the tub empty, turn the dial until only the Rinse light is lit, then press Start. The washer will perform an automated 3-minute self-calibration.
Category 2: Push-Button / Digital Touch Top Loaders (Cabrio, Bravos, Smart Series)
Examples: Whirlpool WTW8500DC, Maytag MVWB835DW, MVW6230HC
- With the machine in standby (plugged in, display off), choose any 3 keys (except Power/Cancel).
- Press them in sequence: 1 – 2 – 3, 1 – 2 – 3, 1 – 2 – 3 (within 8 seconds).
- All console lights will illuminate to confirm entry into Service Mode.
- Press Power / Cancel once to clear historical error codes, or press Start while code 88 or C0 is displayed to initiate the auto-test cycle (varies by model).
Category 3: Front-Load Washers (Duet, Epic, Modern Front Loaders)
Examples: Whirlpool WFW92HEFC, Maytag MHW5630HW
- Standby mode (powered off, plugged in).
- Select any key (except Power) and hold for 3 seconds, release for 3 seconds, repeat 3 times.
- Alternatively, press a 3-key sequence (1-2-3, 1-2-3, 1-2-3).
- The display will show saved diagnostic codes. Press the Power button to exit and clear the saved memory.
Thanks for stopping by! There’s more to come!